
WP InSpot Documentation
Last updated: 2026-08-30 · covers WP InSpot 1.7.3
1. What is WP InSpot?
WP InSpot turns any image on your WordPress site into an interactive one. You draw zones — hotspots — on the image, and each zone can show text, pull in a post or product, open another image, or lead to a link. Visitors explore the image by hovering, clicking or tapping.
Typical uses: apartment and building plans, product photos with feature callouts, venue and attraction plans, museum exhibits, interactive infographics.
1.1. Key concepts
A few terms used throughout this documentation and in the plugin interface:
| Term | Meaning |
|---|---|
| Workspace | The main object you work with: one image plus the zones drawn on it. You create, edit and embed workspaces. |
| Zone (hotspot) | An area drawn on the image — a polygon, rectangle, circle, marker or text label. |
| Zone type | What the zone does: show text, show a post (entity), open a nested workspace, open a link, or nothing. |
| Entity | WordPress content — a post, page or product — shown inside a zone’s popup, drawer or modal. |
| Template | A layout that decides which fields of a post (title, image, price…) appear when an entity zone opens. |
| Nested workspace | A workspace opened from a zone in another workspace. This is how you build image-to-image navigation, e.g. building plan → floor → apartment. |
| Popup / Drawer / Modal | The three ways zone content can be displayed: a small floating box, a panel sliding in from the side, or a centered overlay. |
| Table view | The same zones read as a table — one row per zone — shown beside the interactive image or on its own. |
| Table template | The set of columns a table view shows. Assigned to a workspace; nested workspaces inherit it. |
2. Installation
WP InSpot requires WordPress 5.9 or newer and PHP 8.0 or newer.
2.1. Installing from a ZIP file
- In the WordPress dashboard go to Plugins → Add New.
- Click Upload Plugin.
- Select the WP InSpot ZIP file.
- Click Install Now, then Activate.
2.2. Where to find the plugin
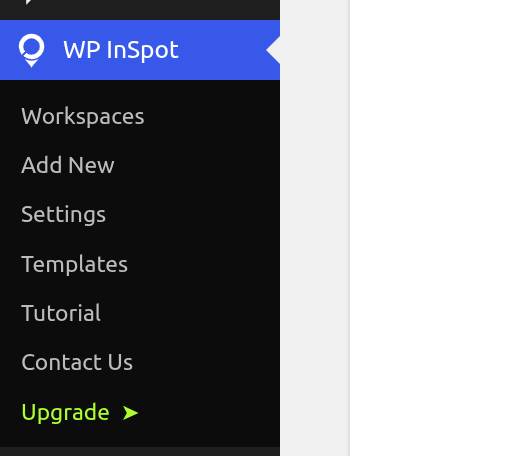
After activation a WP InSpot menu appears in the dashboard:
| Section | What it does |
|---|---|
| Workspaces | The list of your workspaces — edit, duplicate, trash, restore. |
| Add New | Creates a new workspace. |
| Settings | Site-wide appearance and behavior defaults. |
| Templates | Layouts for presenting post data in entity zones. |
| Table Templates | Column sets for the table view. |
| Tutorial | A built-in quick tutorial. |
| Account | Your license and account details. |
3. Quick start: your first workspace
- Go to WP InSpot → Add New and give the workspace a title.
- Click Add Image and pick an image from the Media Library.
- Draw zones on the image with the drawing tools.
- Click a zone, give it a label and choose its type in the Zone Settings panel.
- Fill in the zone’s content — text, a linked post, a nested workspace or a URL.
- Save the workspace.
- Embed it on any page with the WP InSpot block or the shortcode shown in the editor toolbar.
Video placeholder: Creating a workspace from scratch, adding an image, drawing a few zones and embedding the shortcode on a page
3.1. Supported image formats
Any format your visitors’ browsers can display works, including JPEG, PNG, WebP, GIF and SVG. For panoramas, a wide JPEG or PNG works best.
4. Free and Pro
WP InSpot Free is fully functional for smaller projects:
| Area | Free version |
|---|---|
| Workspaces | Up to 3 (published or draft). Existing workspaces always stay editable and keep working. |
| Templates | 1 saved template. |
| Entity content | Posts and pages. |
Pro removes the limits and adds extras:
- unlimited workspaces and templates,
- entity zones for any public post type, including WooCommerce products,
- premium overlay themes (Light, Dark, Glass, Custom),
- template presets — the Classic, Compact and Cards popup layouts,
- column layouts inside a template — building them; a saved layout keeps rendering on any plan,
- action buttons and download buttons in templates,
- building table templates — the columns of the table view,
- scene transition animations between nested workspaces,
- custom colors per zone,
- the Elementor widget,
- workspace import and export.
Pro features are visible in the interface with a lock badge and an upgrade link, so you always see what is available.
4.1. Free for everyone
Some capabilities are deliberately not gated at all — they work the same on every plan, Free included: nested workspaces and back links (within the workspace limit), panorama mode, zone effects, the mobile list view with zone pins, the GA4 analytics bridge, and the table view itself — building the column set needs Pro, but showing a table that exists never does.
WP InSpot also never adds a “Powered by” badge, link or credit to your site — on any plan. Your front end belongs to you.
4.2. If a Pro licence lapses
Nothing disappears from your site. Every workspace keeps rendering for visitors exactly as before. What changes is editing and premium styling: the overlay theme, scene transitions, per-zone colors and template presets fall back to their defaults, and only the oldest workspaces within the Free limit stay editable — the rest become read-only. A template saved with a Pro preset renders in the Default preset, but the choice you made stays in the database untouched, so the layout comes back by itself on the next page load once the licence is back. Action and download buttons already saved in a template keep working too — only adding new ones needs Pro. A column layout built inside a template does not disappear either: without a licence it flattens to a single list of blocks, one after another, keeping every block and all its content. A table template that already exists keeps rendering its table on every page that shows one; only building and editing table templates is locked. Zone effects are unaffected — they belong to every plan, so a lapsed licence never stops a zone from pulsing. Renewing restores everything; nothing is deleted in the meantime.
5. Workspaces
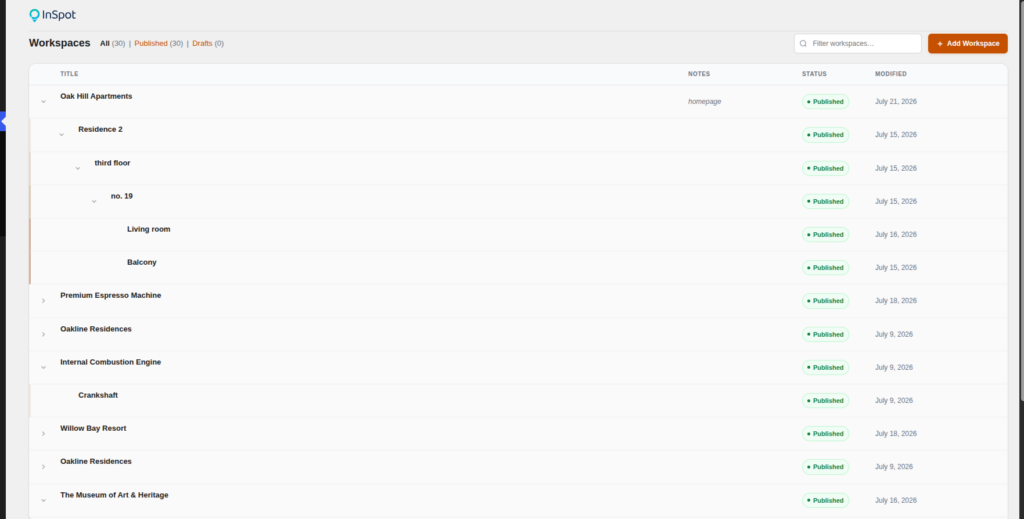
The WP InSpot → Workspaces list shows every workspace with counters for published items and drafts.
Status tabs across the top split the list into All, Published, Drafts and Trash, each with its own count. Workspaces you started but never saved appear as auto-drafts marked with an Unsaved badge, so nothing gets stranded invisibly.
The list also supports:
- filtering by name,
- a hierarchical view — nested workspaces appear under their parent, on every tab. When a parent is trashed or filtered out, its children are promoted to the top level rather than vanishing with it,
- collapsing and expanding branches,
- row actions: Edit, Quick Edit, Duplicate, Trash,
- a checkbox on every row, plus a select-all box in the header — see Bulk actions.
5.1. Quick Edit
Quick Edit changes the workspace title and its parent without opening the editor. The plugin guards the hierarchy for you: the title cannot be empty, a workspace cannot be its own parent, and it cannot be moved under one of its own descendants.
5.2. Bulk actions
Ticking one or more row checkboxes reveals the bulk action bar above the list, so you can act on a whole batch instead of one row at a time.
The select-all box covers exactly the rows you can currently see. Rows hidden by an active filter or folded away inside a collapsed branch are never swept in, and if a row disappears while it is selected — because a filter changed or you collapsed its parent — it drops out of the selection. What you see is what you act on.
Which actions are offered depends on the tab you are in:
| Tab | Available actions |
|---|---|
| All, Published, Drafts | Move to Trash, Duplicate |
| Trash | Restore, Delete permanently |
Destructive actions ask for confirmation first, naming how many workspaces are about to go, and one action handles up to 100 workspaces at a time.
When a batch finishes, the result is reported honestly rather than as a flat “done”: you get the number that went through and, if anything could not be processed, how many were skipped — for example “Moved to trash: 3. Skipped: 2.” A workspace is skipped when you lack the capability to edit it or it no longer exists, and skipping one never stops the rest of the batch.
5.3. Trash and restore
Trashed workspaces move to the Trash tab instead of disappearing. From there each row offers Restore, which puts the workspace back as a draft, and Delete permanently, which removes it for good — along with its zones and image records, so nothing is left orphaned in the database.
5.4. Duplicating a workspace
Duplicate copies the whole workspace: its settings, the image and all zones. When the workspace has nested workspaces, you choose whether to copy it alone or together with its whole nested tree — the copied tree drills down into its own copies, not into the originals. It is the fastest way to create variants of a finished interactive image.
Bulk duplication works differently, on purpose. Duplicating a selection from the bulk action bar copies each workspace on its own: no nested trees are pulled in, and every copy is created at the top level regardless of where the original sat. A bulk copy is a flat batch of starting points, not a cloned hierarchy — the report says so explicitly (“Created 3 copies at the top level. Nested workspaces were not included.”). When you want the tree, duplicate that workspace from its own row.
6. The workspace editor
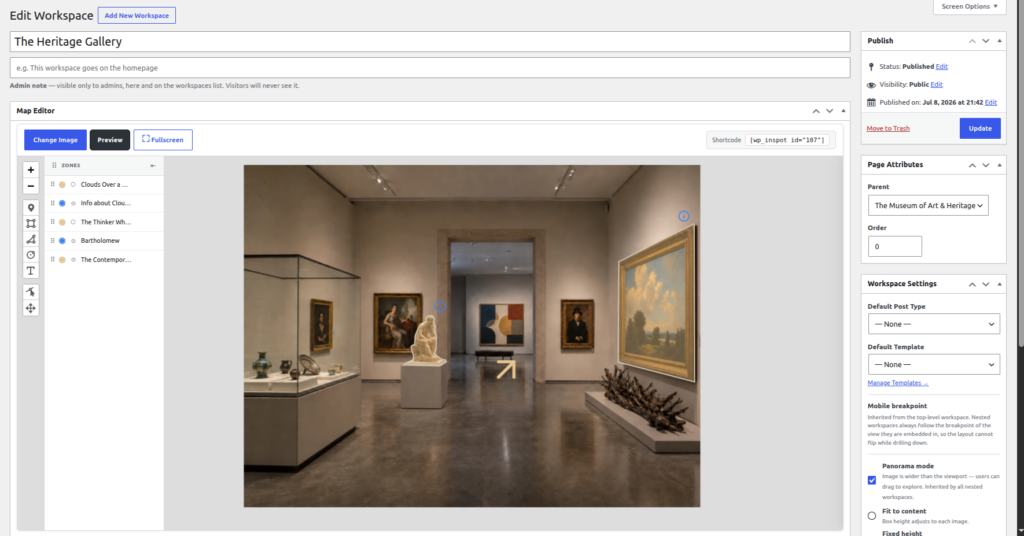
The editor is where you draw and configure zones. It has two parts: the image canvas and the Zone Settings panel.
The toolbar above the canvas offers:
- Add Image / Change Image — picks the workspace image from the Media Library,
- Preview — shows the workspace as visitors will see it, without leaving the editor,
- Fullscreen — expands the editor to the whole screen,
- the workspace shortcode — click it to copy,
- an Unsaved changes indicator so you never lose work unnoticed.
6.1. Drawing zones — shapes
The drawing toolbar offers five shapes:
| Shape | Best for |
|---|---|
| Polygon | Irregular areas — rooms, plots, building outlines. |
| Rectangle | Regular sections of an image. |
| Circle | Points of interest and round objects. |
| Marker | A point with an icon — see Marker icons. |
| Text label | Scalable text placed directly on the image. The zone’s label is the visible text; it scales with the image zoom. |
6.2. Zone settings
Click any zone to open its settings panel:
- Label — the zone name. It appears in tooltips, in mobile lists and is read by screen readers, so give every active zone a clear label.
- Zone Type — Empty, Text, Entity, Nested Workspace or Link (details in the next section).
- Type-specific fields — content, linked post, target workspace or URL.
- Content display — per-zone override of how the content opens (popup, drawer, modal); see Displaying zone content.
- Icon — for marker zones.
- Effect — a looping attention animation for the zone: None, Zoom or Pulse, with Speed and Range controls — see Zone effects.
- Custom colors (Pro) — the palette button in the panel header opens per-zone color overrides, with separate Normal and Hover tabs for fill color, stroke color, opacities and stroke weight (up to 36 px), and a Reset button to return to the global colors. On the free plan the button carries a Pro badge and an upgrade link, so you can see what it does without picking colors that would not be saved.
Clear Zone empties a zone’s configuration; Delete Zone removes it entirely.
6.3. Zone effects
Zone effects draw a visitor’s eye to the zones that matter most. Each zone can loop one of two attention animations:
| Effect | What it looks like |
|---|---|
| Zoom | A gentle “breathing” — the zone softly grows and shrinks. |
| Pulse | A water-ripple echo spreading outward from the zone’s outline. |
Two sliders tune the animation per zone:
- Speed — Low, Mid (default) or High.
- Range — 1–10 (default 5): how far the ripple spreads or how deep the zoom breathes; on markers it controls the ripple size.
Effects work on every shape except text labels, and they are available in every plan, Free included.
They are also polite by design: the animation pauses while the visitor hovers the zone or focuses it with the keyboard, and visitors with the system “reduced motion” preference never see it. Performance-wise the effects are pure CSS animations — GPU-composited, no JavaScript running per frame — so they don’t slow the page down.
7. Zone types
| Type | What it does |
|---|---|
| Empty | Nothing — a decorative or “not yet configured” shape. |
| Text | Shows content you write directly in the zone. |
| Entity | Shows a WordPress post, page or product, rendered through a template. |
| Nested Workspace | Opens another workspace — image-to-image navigation. |
| Link | Takes the visitor to a URL. |
7.1. Empty
An Empty zone displays no content and never opens a popup. Use it to keep a drawn shape on the image before you decide what it should do, or as a purely visual highlight. Give it a label and it shows that label as a hover tooltip — a way to name a spot on the image without attaching any click action.
7.2. Text
A Text zone shows content entered in a full WordPress editor — with headings, bold text, lists, links, images and embedded media. An expand button opens the editor in a large modal for comfortable writing. WordPress shortcodes inside the content are processed when displayed, so galleries and forms work too.
By default the content opens in a popup; you can change that globally or per zone (see Displaying zone content).
7.3. Entity
An Entity zone connects a hotspot to existing WordPress content. In the zone panel you choose:
- a post type (posts and pages in Free; any public type, e.g. WooCommerce products, in Pro),
- the linked post via a search picker,
- a template — or leave “Use workspace default”,
- whether links inside the content open in a new tab — each zone can override the global setting here.
Only published posts are shown to visitors. What the visitor sees — title, image, excerpt, price and so on — is controlled by the template (see Templates).
7.4. Nested Workspace
A Nested Workspace zone opens another workspace when clicked. This builds drill-down structures:
- building plan → apartment,
- venue plan → room,
- overview photo → detail photo.
Pick the target with the workspace picker; an Edit nested workspace link jumps straight to the child’s editor. Visitors navigate back with breadcrumbs, a back arrow, or both — you choose the style in the global settings.
Back links. A nested-workspace zone may also point at any ancestor of the current workspace — for example a “Back to the estate” arrow drawn on an apartment plan. WP InSpot detects that the target is already in the navigation chain and, instead of nesting a loop, rewinds the navigation to that level: breadcrumbs shorten, the browser back button keeps working, and on mobile the list navigation folds back the same way. This works across any number of levels — a zone on level 3 can jump straight back to level 1.
When the target is in the trash. A nested-workspace zone whose target has been trashed stops being shown to visitors — nobody is sent to a dead end. In the workspace editor the same zone stays fully visible, so you can point it at another workspace or delete it. If a zone seems to have disappeared from your published image but is still there when you edit it, this is why: restore the target workspace or repoint the zone.
Video placeholder: Moving from the main image to a nested workspace and back via breadcrumbs
7.5. Link
A Link zone sends the visitor to a URL when clicked:
- external addresses, e.g.
https://example.com, - internal paths, e.g.
/contact, - anchors on the same page, e.g.
#section.
An Open in a new tab checkbox controls the target; new-tab links open with the noopener safety attribute.
8. Displaying zone content: popup, drawer and modal
Text and Entity zones can present their content in three ways:
| Mode | Behavior |
|---|---|
| Popup | A small floating box anchored to the zone. Good for short descriptions. |
| Drawer | A panel sliding in from the left or right edge. Good for longer content. |
| Modal | A centered overlay on top of the page. Good for rich content and galleries. |
| None | The zone stays visible but opens nothing. |
All three close on Escape, on their × button, and on a click outside them. The drawer has no dimming backdrop, so the image behind it stays clickable: a click outside the panel closes the drawer and, when it lands on another zone, opens that zone straight away.
You set the default per content type under Settings → Zones → Content display — one default for text zones, one for entity zones (both start as Popup).
Every text and entity zone can override the default individually: the zone editor has a Content display field with the options “Default (global setting)”, Popup, Drawer, Modal and None. This lets one interactive image mix short popup captions with a drawer for detailed room descriptions.
8.1. Small screens: the bottom sheet
On screens narrower than 576 px, zone content opens in a mobile bottom sheet instead of a popup, modal or drawer — floating boxes are cramped and awkward at that width, and a sheet is what visitors expect from a phone. The switch is controlled by Open content in the bottom sheet on small screens under Settings → Zones → Content display, enabled by default.
This threshold is deliberately independent of the mobile layout breakpoint: the breakpoint decides when the image becomes a list view, this decides how content opens. You can have the full interactive image on a small tablet while its popups already behave like sheets.
There is no width setting. Since 1.6.1 the popup, drawer and modal each take exactly the width the template you built needs, within limits proper to their own kind — a two-column layout gets the room it needs, a single caption does not. Your own CSS can still override the result.
Content follows your theme’s typography. Since 1.7.1 the entity title, field values, text zone content, the WooCommerce price and table cells no longer pin their own font size: they inherit it from your theme’s Customizer typography, so an overlay reads like the rest of the page. The plugin’s own interface elements — buttons, badges, field labels — still set their own size, because they are chrome rather than content.
The look of the three desktop overlays (colors, theme) is configured under Settings → Overlays.
9. Marker icons
Marker zones display an icon at a point on the image.
In the zone panel you can:
- pick an icon from the built-in library — 160 icons in six thematic categories (Rooms & Spaces, General POI, Amenities & Utilities, Building & Structure, Navigation & Wayfinding, Shopping & Ecommerce), all crisp self-hosted SVGs,
- set the size (8–128 px) and rotation (0–359°),
- for custom icons, enable Use zone color to recolor the icon with the zone’s color, including on hover.
Icons scale with the image zoom, with a legibility floor so they never shrink into unreadability.
9.1. Custom SVG icons
You can upload your own SVG icons into the library. Only SVG files up to 512 KB are accepted, and every file is sanitized on upload — scripts, event handlers and external references are stripped — so the library stays safe to use.
Screenshot placeholder: The marker icon picker modal with the built-in icon library and the option to add a custom SVG
10. Templates
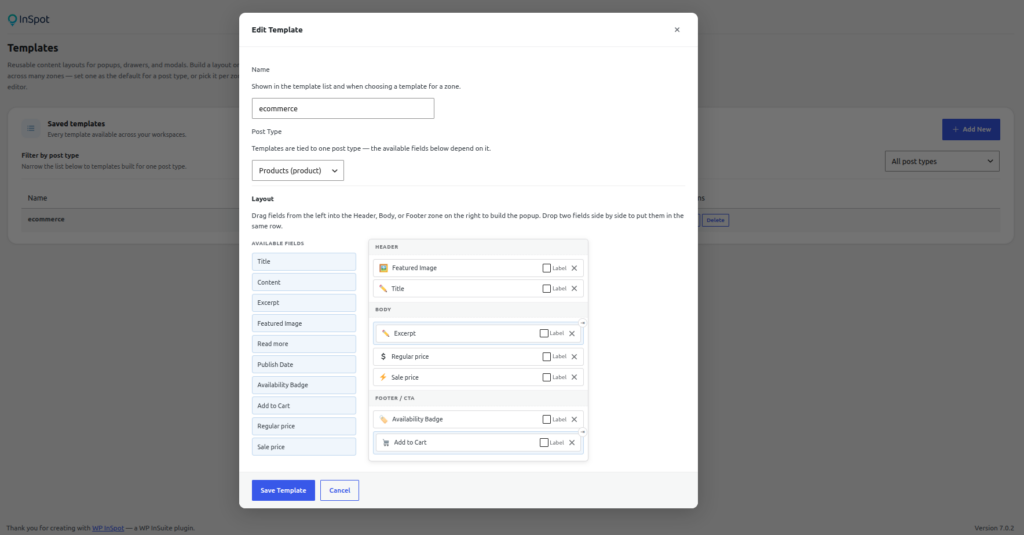
Templates decide what an entity zone shows: which fields of the linked post appear, and in what order. They are managed under WP InSpot → Templates.
The list shows saved templates with a post type filter; you can add, edit and delete them. The Free version includes 1 saved template, Pro removes the limit.
10.1. Template builder
The builder arranges fields in three sections — Header, Body and Footer. Drag fields into a section; two fields can share one row. Every block has the same drag handle, whatever kind of block it is, and a ? icon next to the block types that need a word of explanation — action and download buttons — which opens on hover and on keyboard focus alike.
Since 1.6.1 the builder window is wider, blocks and drag targets are larger, and every setting shows its label above the control with the description below it.
The template editor is fully translatable, and ships completely translated into Polish.
10.2. Template presets
Each template has a Preset field that decides how the popup is laid out on your site, without writing any CSS. The choice applies to the whole template, not to a single block.
| Preset | Layout | Plan |
|---|---|---|
| Default | Label above value. The layout WP InSpot has always used — nothing about it changed. | Free |
| Classic | Label and value on one line, with a hairline rule underneath. For specification data: floor area, storey, price. | Pro |
| Compact | Denser — smaller type, tighter spacing, smaller media. For templates with many fields. | Pro |
| Cards | Every block on its own surface. For popups that mix an image, a price and a description. | Pro |
Nothing is lost if a Pro licence lapses: a template saved with a Pro preset renders in the Default preset, while the saved choice stays in the database. When the licence comes back, so does the layout, on the next page load. The content of the popup is always visible, on any plan.
10.3. Column layout (Pro to build)
Each template section — Header, Body and Footer — has a plus button that adds a row of two columns. Blocks are dragged into either column, so a popup can read “details on the left, floor plan on the right” instead of one long list. A row can be dissolved again, which returns its blocks to the section as ordinary blocks.
Columns are a layout device and nothing more: a column holds blocks, never another row.
Building columns requires Pro. What a licence never touches is the content. Without one, a saved layout does not disappear and is not emptied — it flattens to a single list of blocks in reading order, keeping every block and everything in it. The layout returns by itself when the licence does.
10.4. Available fields
Standard WordPress fields:
| Field | Shows |
|---|---|
| Title | The post title. |
| Content | The full post content. |
| Excerpt | The excerpt, or an automatic summary when no excerpt is set. |
| Featured Image | The featured image. |
| Read more / Permalink | A link to the post. |
| Publish Date | The publication date. |
Beyond these, the template builder can use:
- ACF fields — when Advanced Custom Fields is active: text, textarea, rich text, image, gallery, URL, number, date, date-time, oEmbed/video, and choice fields (radio, select, checkbox, button group),
- custom fields — values registered as post meta,
- WooCommerce fields — for products: an availability badge, an Add to Cart button, and the price (with sale prices shown next to the crossed-out regular price),
- WP InEstate fields — a unit’s floor plan, PDF spec sheet and virtual tour, when WP InEstate is active (see the WP InEstate section).
ACF, WooCommerce and WP InEstate fields appear only when those plugins are active on your site.
A note on ACF choice fields. A radio, select, checkbox or button-group field shows the label, not the stored value — a choice saved as bike: Bike displays “Bike”, and a multiple-choice field displays “Bike, Car”. Grouped choices work the same way; the groups are flattened. A value that is no longer on the field’s list — an option deleted after the post was saved — is shown as the raw stored key rather than disappearing.
A note on ACF images. Image and gallery fields render whatever their Return Format is set to — Image Array, Image ID or Image URL — and carry a srcset just like the featured image. Templates saved before 1.4.0 fix themselves; there is no migration to run.
10.5. Turning a link off
Blocks that render as a link — the post title and URL-type blocks, including “Read more” — have a Link switch on the block’s row in the builder. Turned off, the text stays exactly where it is and simply stops being clickable. This is a free feature.
Linking is on by default, so templates saved earlier render unchanged. The Add to Cart button deliberately has no such switch: it is a cart action rather than a link, and turning it off would only break the button.
10.6. Naming a button yourself
A block that renders as a button — the post link (“Read more”) and any ACF URL field — can carry wording of your own. The button text in the builder row has a pencil beside it; clicking it opens a small field, and confirming or pressing Enter closes it again. The field is only open while you are actually editing, so a long template stays readable.
Leave the field empty and the usual wording is used. The empty field’s placeholder shows you exactly what that default will be, so you never have to guess before typing over it.
10.7. Action buttons (Pro)
An action button is the one template block with no built-in behavior. Clicking it fires a browser event, and what happens next is up to your site’s JavaScript. In the builder you give the button a slug — the name you will recognise it by in code — and a visible label.
The simplest possible test:
document.addEventListener('inspot:action', (e) => {
  console.log(e.detail);
  // { action: "contact", label: "Ask about this unit", postId: 412, … }
});
The event is dispatched on the .wp-inspot-map element and bubbles, so you listen on document. Several buttons in one popup are told apart by e.detail.action, which is why the first line of a real handler is always a filter on the slug.
Recipe: a contact form under the button. The popup is rendered in JavaScript from JSON data, so a form fetched over AJAX would arrive without its CSS or JavaScript — form plugins initialise once, at page load. The form therefore has to be on the page already, and the button only moves it.
Step 1 — keep the form on the page, in a hidden holder:
<div id="form-holder" hidden>
  <div id="contact-form">
    [contact-form-7 id="123"]
  </div>
</div>
Step 2 — move it under the button when the button is clicked:
document.addEventListener('inspot:action', (e) => {
  if (e.detail.action !== 'contact') return;

  const btn  = document.querySelector(
    '.wp-inspot-action-btn[data-inspot-action="contact"]'
  );
  const form = document.getElementById('contact-form');
  if (!btn || !form) return;

  const field = form.querySelector('input[name="unit-id"]');
  if (field) field.value = e.detail.postId ?? '';

  form.hidden = false;
  btn.after(form);
});
Step 3 — move it back out when the overlay closes:
document.addEventListener('inspot:overlayClose', () => {
  const form = document.getElementById('contact-form');
  const holder = document.getElementById('form-holder');
  if (form && holder && !holder.contains(form)) {
    form.hidden = true;
    holder.appendChild(form);
  }
});
Step 3 is not optional: closing the popup only hides it, but opening the next one clears its whole content — which would destroy your form for good, because the form plugin initialised that exact node. A clone will not work.
Adding action buttons to a template requires Pro; buttons already saved in a template keep working on every plan.
10.8. Download buttons (Pro)
The download button is the opposite of the action button: it needs no code at all. You point it at the field holding a file, and the popup gets a download link with a sensible file name.
It renders as a plain <a download> rather than a button, so it works with JavaScript turned off, “save link as” behaves normally, and a middle click opens it in a tab.
- Entries whose field is empty simply do not get the button — better than a dead link.
- Only
httpandhttpsaddresses are accepted, plus paths starting with/. This is validation rather than cosmetics: in anhrefattribute ajavascript:address is executable, unlike in an imagesrc. - The file name comes from the attachment, or from the address path when there is no attachment behind the value.
- The
downloadattribute only forces a download for files on the same domain; for a file on another domain the browser simply opens it.
Where the field list comes from. The File field picker is split in two. At the top, File fields — the ones WP InSpot knows can hold a file. Below, Other fields — may not contain a file, with that warning on the group label.
The split is a hint, not a restriction. A field you added a minute ago holds no values yet, so it cannot be detected — and that is exactly why it stays selectable. Picking a field with no file in it costs nothing more than a button that does not render.
| Field kind | When it lands in “File fields” |
|---|---|
| Featured image | always |
| ACF | when the field type is file, image or URL — the type decides, not the content |
| Post meta | when one of the 25 most recent posts genuinely holds a file in it: an address with a recognised extension, an attachment ID, or an array containing an address |
| WP InEstate | always — the integration declares what those fields hold |
Adding download buttons to a template requires Pro; buttons already saved in a template keep working on every plan.
10.9. Default template
When an entity zone has no template selected and the workspace has no default, a built-in layout is used: featured image, title, excerpt and a “Read more” link.
11. The table view
Any workspace can also present itself as a table: one row per zone, with the columns you decide on. Put that table next to the interactive image and the two work as one — hovering a row highlights its zone on the image, hovering a zone highlights its row, and clicking a row does exactly what clicking the zone does. Put it on a page with no image at all and it stands alone as an ordinary table of prices, areas or opening hours.
The table is built on the server, so its content sits in the page’s HTML from the first byte: search engines read it, and so does a visitor whose browser never runs the scripts.
The feature is opt-in, one workspace tree at a time. A workspace shows a table only once a table template — a set of columns — is assigned to it or inherited from an ancestor; workspaces you leave alone behave exactly as before.
Screenshot placeholder: The Table Templates screen with the column builder open — a template with Number, Flat, Area and Price columns
11.1. Which zones become rows
A row is created for every zone that does something when a visitor clicks or taps it:
| Zone type | Gets a row |
|---|---|
| Text | Yes. |
| Entity (post, page, product) | Yes. |
| Link | Only when it has an address. |
| Nested workspace | Only when it points at a workspace that exists and is not in the trash. |
| Empty (decorative) | No — it has no action on the image and no pin in the mobile list either. |
Rows follow the zone order you set in the editor, and they are numbered exactly like the pins in the mobile list view: row 4 and pin 4 are the same zone, always.
Only the workspace’s own zones become rows. A nested workspace has its own table, which the visitor sees when they drill into that level — see Table and interactive image side by side.
11.2. Building a table template
Table templates have a screen of their own: WP InSpot → Table Templates. They are unrelated to the entity templates of the previous section — those describe one popup, these describe the columns of a table whose rows routinely mix post types.
Step 1 — Add New. Give the template a Name. It is what you pick later in a workspace’s settings, so name it after what it describes (“Flats and parking”), not after one page.
Step 2 — Decide what an empty cell shows. Empty cell is rendered wherever a row has no value for a column — an em dash (—) by default. Leave it blank for a genuinely empty cell.
Step 3 — Tick the post types you want to preview. This decides only which fields the picker offers and what the “Has a value in:” hint can check. It is never stored in the template: a table template belongs to no post type, which is what lets one workspace mix flats, parking spaces and anything else in one table. Your ticks are remembered in your browser, not in the template.
Step 4 — Add the columns. A column is a Header plus one Field, and nothing else. Columns are built side by side in the order the table renders them and can be moved left or right; a template holds up to 50 of them.
Two things are worth knowing before you build the first column:
- Columns never disappear. The table renders every column of the template, in template order, whatever the data holds. A row with no value for a column shows the empty cell — so the table reads the same at every level, and a visitor is never left wondering whether a flat has no balcony or the table stopped showing balconies.
- A column with no field is a legitimate column. The first option in the field list is No field — always the empty cell. Use it for a column you will fill in later, without it looking broken in the meantime.
The “Has a value in:” hint. As you pick a field, the builder checks the 10 most recent published entries of each previewed post type and reports where that key actually holds something. It is a hint, never a gate: your live data is not that sample, a field nobody fills today may be filled tomorrow, and a column that is meaningful for half the rows is the normal case rather than a mistake. Keys that read the zone are reported as filling every row, because they do.
Fields are offered by their name, not their key. A meta field registered with a readable label — “Rooms” for house_rooms — is listed under that label, falling back to its description and only then to the raw key. The same is true in the entity template builder.
Building table templates requires Pro. Without a licence the screen stays readable and every saved template keeps rendering on the front end — only creating, editing and deleting are locked.
11.3. Field keys
Most of the time the picker writes the key for you. Type one by hand — Custom…, the last entry in the field list — when the field comes from somewhere the picker cannot see: another plugin’s meta, or a post type you are not previewing.
| Key | What the cell shows |
|---|---|
zone:label | The zone’s own label, as typed in the editor. |
zone:number | The row’s number — the same number as the pin in the mobile list. |
zone:title | The best name available: the linked entry’s title, else the nested workspace’s title, else the zone label. |
post_title | The title of the entry attached to the zone. |
post_excerpt | Its excerpt. |
post_date | Its publication date. |
permalink | Its address, rendered as a link. |
acf:field_name | An ACF field on the entry. |
meta:key_name | Post meta, including fields registered by other plugins. |
wc:regular_price, wc:sale_price, wc:availability | WooCommerce pricing and availability, on products. |
The three zone: keys are the only ones guaranteed to say something in every row, because they read the zone rather than a post: a row exists for a text zone, a nested workspace and a bare link too, and none of those has an entry behind it. A first column of zone:title is the simplest way to make sure every row is named.
The permalink column renders as a link, and names itself. The cell is a real link rather than a printed address, and its text comes from the post type’s own “View” label — “View post”, “View page”, or whatever a custom post type calls it, translated by that post type rather than configured here. A workspace mixing flats and parking spaces therefore never shows a link naming the wrong kind of entry. The column header is a separate thing and still reads whatever you named it. An unpublished entry leaves the cell empty rather than linking to it.
Cells hold short text by design. A field whose value is an image, a gallery or an attachment array has nothing to print in a table cell and shows the empty cell instead.
Unpublished entries never contribute a value. A draft, pending or private entry attached to a zone still gets its row — the row’s label comes from the zone, not from the entry — but every cell that would come from that entry stays empty. Nothing unpublished can surface through a table a visitor can see.
11.4. Assigning a template to a workspace
Open the workspace and pick the template in the Table view select in its settings panel. Nested workspaces inherit from the nearest ancestor that names one, so assigning a template once on a building covers every floor and every flat below it. A nested level can still name its own template when its rows are genuinely different.
Leaving the select empty means “inherit”, not “no table” — and the panel says which template is in force underneath, or tells you that no ancestor names one.
Deleting a table template is safe: workspaces that used it fall back to their parent’s template, or show no table.
Duplicating a workspace carries its table-view assignment along with the rest of its settings.
11.5. Placing the table on a page
Two ways, the same result:
- the WP InSpot Table block — pick a workspace and the editor shows the real table, rendered by the same code the front end uses,
- the shortcode:
[wp_inspot_table id="123"]where 123 is the workspace ID — the same ID as in that workspace’s own shortcode.
A table with nothing to show renders nothing at all: no headers, no empty frame, only a comment in the page source. That is deliberate, because a table is often placed beside an image whose workspace has no template yet, and a warning box on a live page is the wrong way to mention it. There are four reasons a table renders nothing, and none of them is an error: the workspace inherits no table template, the template has no columns, no zone qualifies as a row, or the workspace is not published and the visitor is not someone who may edit it.
11.6. Table and interactive image side by side
Put the table and the image of the same workspace on one page and they pair up by themselves — there is nothing to wire beyond both blocks pointing at the same workspace:
- hovering or keyboard-focusing a row highlights its zone on the image, and hovering a zone highlights its row, scrolling it into view when the table is long,
- clicking a row does exactly what clicking the zone does: opens the popup, drawer or modal, follows the link, or drills into the nested workspace,
- if the image is off screen when a row is clicked, the page brings it into frame first, so the visitor sees what their click did,
- when the visitor drills into a nested workspace, the table switches to that level by itself, and going back switches it back. A level with no table view of its own hides the table until the visitor returns to a level that has one,
- selecting text in the table never opens anything — a table of prices and areas is something people copy.
Rows become clickable only while there is an image to drive. Before the viewer lazily starts up, and in the mobile list view where the image is hidden behind the accordion, the table is plain content: a row that looked clickable and did nothing would be worse than a row that never claimed to be. On mobile the list view is itself the interactive list, so nothing is lost.
On a page with no image at all, the table simply stays what the server rendered.
The pairing key is the workspace ID, so several tables and images can share a page. Two tables of the same workspace pair with the first and the second image of that workspace, in the order they appear on the page.
Row clicks are reported to analytics exactly like zone clicks, because they run the zone’s own action: a row that opens a popup produces the same inspot_zone_click and inspot_overlay_open events as the zone would — see Measuring engagement with Analytics.
11.7. Styling one column
Columns deliberately have no alignment setting. Every header and cell carries a data-column-id attribute, so your theme can target exactly one column — right-align a price, widen a name, hide a column on narrow screens — instead of the plugin guessing on your behalf:
.wp-inspot-table td[data-column-id="c3"] { text-align: right; }Styling a cell by its value. Since 1.5.4 every non-empty cell also carries data-value, holding the field’s stored value rather than the text on screen — so a rule survives translating the page or renaming a label:
.wp-inspot-table td[data-value~="sold"] { color: #b91c1c; }A cell with several values lists them separated by spaces, which is why ~= is the operator to reach for. Three things deliberately carry no token: a value longer than 32 characters (prose and formatted prices are not categories worth a selector), a value that is only punctuation, and the permalink column, whose value is a destination unique to each row.
Cells filled with the empty placeholder carry an extra class, so they can be greyed out as a group. The full list of classes and attributes is in the technical reference.
12. Workspace settings
Each workspace has its own settings panel in the editor, next to the publish box.
12.1. Default Post Type and Default Template
The default post type pre-selects the post type for new entity zones. The default template applies to every entity zone that doesn’t pick its own — a quick way to keep one look across the whole interactive image. A Manage Templates link leads to the template builder.
12.2. Mobile breakpoint
By default the workspace follows the global mobile breakpoint (see Global settings). Choose Custom to give this workspace its own switching point (1–1280 px) — at 1 px the mobile view never activates for this workspace. Nested workspaces always inherit the breakpoint of the top-level workspace they are opened from, so the layout can’t flip while a visitor drills down.
12.3. Panorama mode
Panorama mode is for images much wider than the screen — the visitor drags to explore, with zoom and a navigation toolbar.
| Setting | Meaning |
|---|---|
| Panorama mode | Turns the mode on. Inherited by all nested workspaces. |
| Fit to content | The box height adjusts to each image. |
| Fixed height | The box keeps a set height (100–2000 px) and the image scrolls inside. |
In fixed-height mode a wide image spans the full height with the sides panning, rather than sitting in a letterbox with empty bars above and below, and fullscreen opens with the screen fully covered. Zooming out to see the whole image at once is still available.
12.4. Scene transition (Pro)
A workspace can define its own animated transition when visitors move between nested workspaces, or follow the global default:
| Setting | Options |
|---|---|
| Effect | Global default, None, Fade, Zoom, Blur. |
| Duration | 100–2000 ms. |
| Intensity | 1–100 — strength of the zoom/blur effect. |
| Easing | Ease in-out, Ease out, Linear. |
| Apply on | Drill-down (entering a nested workspace) and/or back navigation. |
Visitors with the system “reduced motion” preference never see the animations.
12.5. Table view
Picks the table template whose columns this workspace’s table shows. Leaving it empty means the workspace inherits the template of the nearest ancestor that names one, and the panel tells you which template that is — see Assigning a template to a workspace.
12.6. Duplicate, Export and Import
The panel also holds the Duplicate Workspace button and the Export JSON / Import JSON buttons (Pro) — see Import and export.
13. Global settings
WP InSpot → Settings holds site-wide defaults in three tabs: Zones, Overlays and Behaviour. These are defaults — individual workspaces and zones can override the settings that matter to them, as noted throughout this documentation.
Screenshot placeholder: The WP InSpot Settings view with the Zones, Overlays and Behaviour tabs
13.1. Zones tab
Zone appearance sets the default colors per zone type — Text, Entity, Nested Workspace and Link zones each get their own stroke color, fill color, fill opacity, stroke weight and stroke opacity, in the normal state and on hover. The defaults ship as a readable palette:
| Type | Base color | Hover color |
|---|---|---|
| Text | blue | darker blue |
| Entity | green | darker green |
| Nested workspace | amber | darker amber |
| Link | indigo | darker indigo |
with a subtle 20% fill that rises to 45% on hover.
The color pickers offer one-click swatches: your five most recently used colors plus the site’s theme palette (filterable by developers via wp_inspot_picker_palette).
Nested zone cursor picks what the mouse cursor turns into over a zone that leads deeper: Pointer, Default, Crosshair, Zoom in, or a custom “Enter” icon.
Content display sets the default popup/drawer/modal/none mode for text and entity zones, and holds the bottom sheet on small screens switch — see Displaying zone content.
13.2. Overlays tab
Theme applies a visual style to every popup, drawer and modal: Classic (default), Light, Dark, Glass or Custom. Themes other than Classic are Pro. The Settings page shows a live preview of the selected theme, so you see the popup styling change as you pick.
Layering raises the stacking order (z-index) of popups, drawers and modals — useful when a theme’s sticky header covers them.
Choosing the Custom theme reveals detailed controls:
| Overlay | Settings |
|---|---|
| Popup | Background, text color, border radius, width (200–600 px), padding, drop shadow. |
| Drawer | Background, text color, side (left/right), width (240–600 px), padding. |
| Modal | Background, text color, border radius, max width (320–960 px), padding, backdrop color and opacity. |
13.3. Behaviour tab
Interaction controls how visitors open zones:
| Setting | Options and default |
|---|---|
| Trigger | Hover (click to pin) — default — or Click only. Hover previews content on mouseover and pins it on click. |
| Mobile trigger | Click only (default) or Same as desktop. |
| Open entity links in a new tab | On by default; each entity zone can override it. |
| Show tooltip on hover | On by default — shows the zone’s label before it is opened. |
| Show fullscreen button | On by default — adds a fullscreen toggle to every interactive image. |
| Marker radius | Size of plain circular markers (4–40 px, default 10). |
Scene transitions (Pro) sets the default animation between nested workspaces — effect, duration, intensity, easing, and whether it plays on drill-down and/or on the way back. Workspaces can override it individually.
Advanced holds:
- Mobile breakpoint — below this width (default 768 px) the image switches to the mobile list view; workspaces can override it,
- Breakpoint measures — what the breakpoint is compared against. Viewport compares it against the browser window width — the classic behavior everyone expects from a “mobile breakpoint”. Container compares it against the element the image is embedded in: useful when an interactive image sits in a narrow sidebar or grid column and should present the list view even on desktop,
- Nested nav style — how visitors go back up from nested workspaces: Breadcrumbs, Back arrow, Both, or None. None removes the breadcrumb and back-arrow chrome altogether; use it only for workspaces that offer their own way back — a zone pointing at the parent workspace — because otherwise visitors have no way out of a nested view on desktop,
- Show breadcrumbs on full screen — keeps the back navigation visible as a floating bar in fullscreen mode,
- Hide breadcrumbs on mobile — hides the breadcrumb trail on small screens (below 768 px), both inline and in fullscreen. The Back button stays visible, so navigation is never lost — this only reclaims vertical space.
Whatever nav style you choose (except None, which removes the bar altogether), the navigation bar also carries a Back to the first image button. It takes the visitor straight out of the nesting instead of stepping up one level at a time, and it appears only once there is somewhere to return to.
That button returns the visitor to the start of their own visit — the image the page embeds — not to the top of the workspace tree. The difference matters on a page that embeds a nested workspace: the tree’s root is a level that visitor has never seen, and sending them there would be a surprise rather than a way back.
Data & uninstall decides what happens when the plugin is deleted — see Your data.
14. Embedding a workspace on a page
14.1. Shortcode
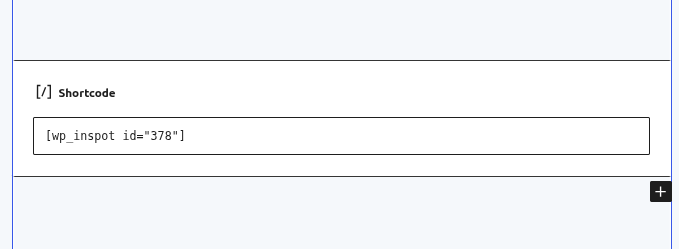
[wp_inspot id="123"]where 123 is the workspace ID. The exact shortcode is displayed in the workspace editor toolbar — click it to copy. The shortcode works in the classic editor, in a Shortcode block, and in any page builder that renders WordPress shortcodes.
It also accepts an optional class attribute for custom CSS targeting:
[wp_inspot id="123" class="my-plan"]14.2. Gutenberg block
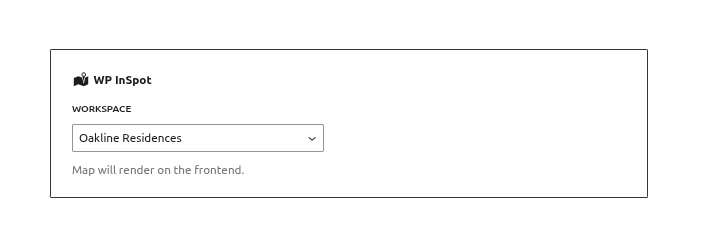
In the block editor, add the WP InSpot block and pick a workspace from the list. The block renders the same interactive image as the shortcode, and carries the WP InSpot brand icon in the inserter.
There is a second block, WP InSpot Table, for the table view — a grid icon rather than the brand mark, so the two are easy to tell apart in the inserter. It takes the same workspace and can be used with or without the image block on the page; see Placing the table on a page.
14.3. Elementor widget (Pro)
Pro adds a native Elementor widget: drop it into a layout and select a published workspace.
14.4. Other page builders
For builders without a native integration, use the shortcode.
15. What visitors see
WP InSpot renders your interactive image as a smooth, responsive viewer that adapts to its container. Its scripts and styles load only on pages that actually contain a workspace, and the viewer initializes lazily — one further down the page starts up just before it scrolls into view.
A workspace that is in the trash renders nothing at all. The shortcode, the block and the Elementor widget all output no markup for it — not even an empty container — so a page never shows a hollow box where a trashed workspace used to be. This applies to everyone, including logged-in editors browsing the public page.
While the workspace image is still downloading, the viewer shows a shimmering placeholder in the image’s place, so the area never looks broken or empty on a slow connection.
Zone content is warmed in the background shortly after the image appears, so opening a zone usually shows its content immediately rather than a loading step — see Performance notes for how that works and when it does not apply.
15.1. On desktop
- Hovering a zone highlights it and, with the default trigger, previews its content; clicking pins the content open.
- Tooltips show zone labels before opening.
- Link zones navigate, nested workspace zones drill down with breadcrumb/back navigation, entity zones fetch the post and render it through its template.
- The fullscreen button expands the image to the whole screen.
- Where the page also carries the workspace’s table, rows and zones highlight each other and a row click behaves like a zone click — see Table and interactive image side by side.
15.2. On mobile
Below the mobile breakpoint the interactive image becomes a touch-friendly list view — but the image stays interactive:
- the image appears as the view header, and every zone gets a numbered pin on the photo matching the numbered rows in the list below — tapping the pin or the row does the same thing,
- rows show what they are at a glance: content, an external link (marked with an arrow), or a nested workspace with a zone counter,
- nested workspaces expand in place like an accordion: their zones read as an indented block, opening a group folds its siblings, and the open group’s header sticks to the top while you scroll,
- text and entity content opens in a bottom sheet, closed with a button, a tap on the backdrop, or a swipe down,
- tapping the image opens a zoom view that keeps the interactive pins,
- link zones behave as normal links,
- Empty (decorative) zones get no pin and appear greyed-out in the list,
- a table view on the same page stays a plain, readable table: the list view is already the interactive list, so the table stops driving the hidden image rather than pretending to.
The fullscreen button on mobile opens the image in a lightbox with the same tappable pins. Nested workspaces drill down inside the same modal, content opens in the bottom sheet on top, and back links rewind the stack.
Note that the bottom sheet has its own threshold (576 px) separate from the mobile breakpoint — see Small screens: the bottom sheet. On a device between the two widths, visitors get the full interactive image with sheet-style content.
Video placeholder: The same workspace on desktop and mobile, including the bottom sheet on mobile
15.3. Panorama mode
With Panorama mode on, visitors drag to pan across a wide image, zoom in and out, and can use an on-screen navigation toolbar with arrow and zoom buttons. The view is constrained so nobody gets lost outside the image.
16. Measuring engagement with Analytics
Which apartment gets the most clicks on your floor plan? Do visitors actually open the room details, or just hover and leave? WP InSpot answers these questions with your existing analytics — it is GA4-ready out of the box.
Every meaningful interaction with an interactive image is forwarded to the analytics your site already runs. The plugin never loads Google itself and sends nothing anywhere on its own:
- If Google Analytics 4 is present (
gtag), events are sent withgtag('event', …). - Otherwise, if a Google Tag Manager container is present (
dataLayer), events are pushed to the data layer. - With neither, nothing happens — and there is no performance cost.
No settings, no API keys, no configuration. If GA4 or GTM is installed on the site in any way (Site Kit, a theme option, a snippet plugin, hand-pasted snippet), WP InSpot events start flowing the moment a visitor interacts with an interactive image.
Requirements: WP InSpot 1.1.0 or newer. Works on the free plan.
16.1. Event reference
All events are sent with the names and parameters below — to GA4 as event parameters, to GTM as data layer keys. Empty parameters are omitted.
| Event | Fired when | Parameters |
|---|---|---|
inspot_map_view | an interactive image boots as it scrolls into the viewport (impression) | workspace_id, workspace_title |
inspot_zone_click | a zone is clicked | workspace_id, zone_id, zone_label, zone_type, mode, link_url |
inspot_overlay_open | a popup, drawer, modal, or mobile bottom sheet opens | workspace_id, zone_id, zone_label, mode |
inspot_drilldown | the visitor enters a nested workspace | workspace_id, workspace_title, depth |
inspot_nav_back | back button or breadcrumb navigation | workspace_id, workspace_title, depth |
inspot_action | an action button in an entity popup is clicked | workspace_id, zone_id, action, action_label, post_id |
inspot_download | a download button in an entity popup is clicked | workspace_id, zone_id, file_url, file_name, post_id |
inspot_fullscreen_open | fullscreen mode opens | workspace_id |
inspot_fullscreen_close | fullscreen mode closes | workspace_id |
The event names keep the historical inspot_map_* spelling for continuity: renaming them would silently break every report, dashboard and GTM trigger already built on them. The interface language moved from “map” to “image” in 1.2.7; the analytics contract deliberately did not.
Parameter details:
workspace_id/workspace_title— the workspace the visitor is looking at.zone_id/zone_label— the zone that was clicked or whose content opened. The label is the zone’s title from the editor.zone_type— the zone’s type:link,child_image(nested workspace), an entity zone, ortext.mode— what the click did:link,drill-down,popup,drawer,modal,bottom-sheet, oraccordion(mobile list view).link_url— the target URL, present on Link-zone clicks only. This is your outbound-click tracker.depth— nesting level after navigation (root = 0), so you can measure how deep visitors explore.action/action_label— the action button’s slug and its visible label. The slug is the parameter that matters in reports; the label is kept separate fromzone_label.file_url/file_name— the downloaded file’s address and name.post_id— the entry whose popup the button was clicked in.
Action and download buttons are the closest thing WP InSpot has to a conversion, which is why they are forwarded automatically, with no configuration on your side. Both are worth registering as key events in GA4.
Hovers and overlay closes are deliberately not forwarded — they are noise in GA. Both remain available as DOM events for custom integrations (see the developer subsection below).
Clicks in a table view are not a separate event family. A row runs its own zone’s action, so it reports exactly what that zone reports — a zone click, and then an overlay open or a drilldown. Rows and zones are measured together and the events do not say which of the two the visitor used, so a table added to an existing page raises the counts on the zones it lists rather than starting a new series.
16.2. Quick start with GA4 (gtag)
Nothing to configure — verify and then decide what matters:
- Verify with DebugView. In GA4 open Admin → DebugView, then interact with an interactive image on your site (with the GA Debugger browser extension, or with
?gtm_debug=xappended to the page URL). Theinspot_*events appear in the stream within seconds. - Register key events. In Admin → Events, the
inspot_*events appear automatically after the first traffic. Toggle the ones that represent success for you — for exampleinspot_zone_click— as key events (conversions). - Add custom dimensions for reporting. In Admin → Custom definitions, register the parameters you want to slice reports by — typically
zone_label,workspace_title, andzone_type(scope: event). From then on you can build a report of clicks per zone.
16.3. Quick start with Google Tag Manager
- Trigger. Create a Custom Event trigger. Event name:
inspot_.*with “Use regex matching” enabled — one trigger catches every WP InSpot event. (Or create one trigger per event name for finer control.) - Variables. Create Data Layer Variables for the parameters you need:
zone_label,zone_type,workspace_title,link_url,depth, … - Tag. Create a GA4 Event tag, fire it on the trigger from step 1, set Event Name to
{{Event}}(passes theinspot_*name through), and map the variables from step 2 as event parameters. - Test in Preview mode, then publish the container.
16.4. Any other analytics tool (developers)
The GA bridge sits on top of a public DOM event API. Every interaction dispatches a CustomEvent on the image wrapper that bubbles to document, so you can feed Matomo, Plausible, Fathom, or your own backend:
| DOM event | Matches GA event |
|---|---|
inspot:zoneClick | inspot_zone_click |
inspot:zoneHover | — (CustomEvent only) |
inspot:overlayOpen / inspot:overlayClose | inspot_overlay_open / — |
inspot:workspaceEnter | inspot_map_view (depth 0) / inspot_drilldown |
inspot:workspaceBack | inspot_nav_back |
inspot:action | inspot_action |
inspot:download | inspot_download |
inspot:fullscreenOpen / inspot:fullscreenClose | inspot_fullscreen_open / _close |
Zone-event payload (event.detail):
{
  zoneId: "106",            // zone id
  label: "Bedroom",         // zone title from the editor
  type: "child_image",      // zone type: link | child_image | text | entity…
  postId: 42,               // linked post id (entity zones), or null
  templateId: 3,            // template used (entity zones), or null
  linkUrl: null,            // target URL (link zones), or null
  workspaceId: "1119",      // workspace the zone belongs to
  mode: "drill-down"        // what the interaction did
}
Navigation events (inspot:workspaceEnter / inspot:workspaceBack) carry { workspaceId, title, depth }; fullscreen events carry { workspaceId }.
Button events carry the entry they were clicked in:
// inspot:action
{ action, label, postId, templateId, permalink, workspaceId, zoneId }

// inspot:download
{ url, filename, label, postId, templateId, permalink, workspaceId, zoneId }
The difference between the two is worth keeping in mind: inspot:action is where you implement the behavior, since the button has none of its own; inspot:download reports a download the plugin has already performed, so a listener there is measuring or annotating, not acting. inspot:overlayOpen and inspot:overlayClose are the useful pair when you move DOM elements into a popup — see the action-button recipe in the Templates section.
Example — send zone clicks to Plausible:
document.addEventListener("inspot:zoneClick", (e) => {
  plausible("Zone Click", {
    props: { zone: e.detail.label, workspace: e.detail.workspaceId },
  });
});
Example — Matomo:
document.addEventListener("inspot:zoneClick", (e) => {
  _paq.push(["trackEvent", "WP InSpot", "Zone Click", e.detail.label]);
});
The detail object is frozen (read-only). Events fire for every interactive image on the page; attach one listener on document and you cover them all.
16.5. Disabling the GA bridge
If you prefer to handle tracking yourself (or a client asks for it to be off):
add_filter( 'wp_inspot_analytics', '__return_false' );or from JavaScript, before the visitor interacts with the image:
window.wpInSpotAnalytics = false;Both switches stop only the GA4/GTM forwarding. The inspot:* DOM events keep firing — they are inert without a listener and cost nothing.
16.6. Privacy and GDPR
- Event payloads contain only content identifiers — workspace and zone IDs and titles. No visitor data, no fingerprinting, no cookies, no requests to third parties.
- WP InSpot itself never contacts Google or any analytics endpoint. Events land exclusively in the analytics tool the site owner has installed — consent handling stays where it belongs, in that tool’s consent setup (a consent manager blocking
gtag/GTM also blocks these events automatically, since withoutgtagordataLayerthe plugin sends nothing). - Nothing about visitors is stored by WP InSpot, so the feature adds no entry to your privacy policy beyond what your analytics tool already requires.
16.7. Analytics FAQ
Do I need to configure anything in WP InSpot? No. If GA4 or GTM is present on the page, events flow automatically. There is no settings screen for this — by design.
Does this work with consent managers (Cookiebot, Complianz, …)? Yes, automatically. Until the visitor consents, the consent manager withholds gtag/dataLayer, so WP InSpot has nowhere to send events. After consent, events flow. The plugin checks the transport at the moment of each event, not at page load.
Can I track which zones get the most clicks? Yes — that is exactly what inspot_zone_click with the zone_label parameter is for. Register zone_label as a custom dimension in GA4 and build a report grouped by it.
Does it slow down the site? No. The bridge is a few event listeners; when no analytics is present, an interaction ends in a single skipped function call.
17. Accessibility
WP InSpot interactive images are usable without a mouse and friendly to assistive technologies:
- a skip link lets keyboard users jump past the image,
- the image announces itself and its state changes to screen readers,
- the image is a single Tab stop; arrow keys move between zones, Enter and Space open them,
- empty zones are hidden from assistive technologies,
- popups, drawers and modals behave as proper dialogs — focus moves in, stays trapped, and returns to the zone on close,
- zone effects pause while a zone is hovered or keyboard-focused, so motion never competes with reading,
- with the system “reduce motion” preference, scene transitions and zone effects are disabled.
The table view keeps the same standard:
- it is a real table with real header cells, so screen readers announce row and column context,
- the scroll container it sits in is named after its workspace and reachable by keyboard, so a wide table can be panned without a mouse,
- an active row is activated by a button inside its first cell rather than by turning the row itself into a button — the row stays a row, and Enter, Space and the focus ring come for free,
- when a row’s own text does not identify it (a bare row number, an empty cell), the button borrows the whole row’s text as its accessible name,
- rows stay in the natural tab order, so tabbing through a table moves down it rather than throwing you out of it,
- after a row drills into a nested level, focus lands on the new table rather than falling back to the top of the page.
What you can do as an author: give every active zone a readable label, avoid image-only popup content, check the contrast of zone colors against your image, and add a short instruction above very complex images.
18. Import and export (Pro)
18.1. Export
Export JSON in the workspace settings panel downloads the workspace as a JSON file: the title, images (with attachment IDs and URLs) and every zone with its shape, coordinates, type, content and styling.
18.2. Import
Import JSON adds the zones from a file to the target workspace:
- if the target workspace has no image, the importer finds the attachment by ID or by URL,
- zones whose image cannot be found are skipped,
- references to posts, templates and child workspaces are kept only when those objects exist on the target site,
- after finishing, the importer reports how many zones were imported and how many were skipped.
18.3. Moving between sites
Export moves the zone structure, not the whole environment. Before importing on another site, make sure the images exist in its Media Library and that referenced posts, templates and child workspaces exist there too — anything missing is simply skipped and can be reconnected manually.
Table templates are not part of the export yet. The file carries the workspace’s images and zones, not its column set, so a workspace imported on another site shows no table until a table template is built there and assigned to it. Nothing breaks in the meantime — the table simply does not appear. Rebuilding a column set is a few minutes of work, and it is on the list to automate.
19. Multilingual sites (WPML / Polylang)
Workspaces are translatable content: both WPML and Polylang recognize them out of the box. When a page embeds a workspace, the plugin automatically resolves the right language version of that workspace for the visitor’s current language — you can keep one shortcode and translate the workspace like any other content.
On multilingual sites the workspace list in wp-admin also shows a language flag next to each workspace and adds a language filter above the list, so you can quickly find the version you need.
The plugin interface itself ships fully translated into Polish, and is translation-ready for any other language via the bundled .pot template.
20. WP InEstate integration
WP InSpot integrates with the WP InEstate real-estate plugin: WP InEstate’s export and import can carry WP InSpot workspaces along with property data, and the exporter automatically includes nested workspaces connected to the ones you select. No configuration is needed — the integration activates when both plugins are present.
Unit media fields in the template builder. A unit’s media fields are offered in the template editor under a WP InEstate group, with readable names instead of raw keys: Floor plan, Unit PDF and Virtual tour.
They were previously invisible there. WP InEstate registers unit meta as protected (a leading underscore), and protected fields are skipped by the field list. The remaining InEstate fields — internal notes and pricing internals among them — deliberately stay hidden; only these three are named and offered.
The virtual tour is deliberately not counted as a file: it is a page to visit, not a file to save, so a download button would promise something it cannot deliver. It stays selectable by hand from the second group, but its natural place is an ordinary link block.
Floor plan and Unit PDF as a picture in the popup — not yet. Both fields work today as a download source. Placed in a template as a plain image block they do not render correctly yet: meta values are not normalised by declared type the way ACF values are.
21. Your data
- Deactivating the plugin changes nothing — all workspaces, zones and settings stay in place.
- Deleting the plugin also keeps your data by default.
- If you want a clean uninstall, enable the options under Settings → Behaviour → Data & uninstall first: one removes the plugin’s tables, settings and uploaded icons, the other also deletes all workspace posts. Both are off by default and take effect only when the plugin is deleted.
Moving a workspace to the trash takes it off your site immediately: every page that embeds it stops rendering it, without you having to edit those pages. Restoring the workspace from the Trash tab brings it back on exactly the same pages. Trashing is reversible — nothing about the workspace is lost while it sits there.
Permanently deleting a single workspace from the Trash also removes its zones and image records, so the database does not accumulate orphaned rows.
22. Common usage scenarios
22.1. Apartment or building plan
- Create a workspace with the floor plan.
- Draw zones for the rooms.
- Use Text or Entity zones for room details.
- Use Nested Workspace zones for per-room or per-floor views.
- Embed the workspace on the offer page.
- For a building or a floor with many units, build a table template (unit, area, rooms, price, status) and place the WP InSpot Table block under the plan: buyers who want to compare figures read the table, buyers who think in layouts click the plan, and both are looking at the same zones.
22.2. Interactive product photo
- Add the product photo as the workspace image.
- Mark features with markers.
- Use Text or Link zones for the callouts.
- With WooCommerce, use Entity zones with a product template — price and Add to Cart included.
22.3. Attraction or venue plan
- Add the venue plan.
- Create markers for points of interest.
- Use Text zones for short descriptions and Entity zones with a template for rich ones.
- Use Nested Workspace zones to enter buildings or areas.
22.4. Museum or educational exhibition
- Add a photo of the room, exhibit or diagram.
- Mark the interesting elements with zones.
- Use Text for captions or Entity for full articles.
- Give every zone a readable label and check zone contrast — see Accessibility.
23. Troubleshooting
23.1. The workspace does not appear on the page
Check that:
- the workspace is not in the trash — a trashed workspace deliberately renders nothing anywhere, and restoring it from the Trash tab brings it straight back,
- the shortcode has the correct ID,
- the workspace is published,
- the workspace has an image assigned,
- there is no JavaScript conflict on the page,
- the page cache is not serving an old version.
23.2. Zones are not visible
Check that:
- the zones were saved,
- the colors and opacities don’t make the zones invisible against the image,
- the image wasn’t replaced with one of very different proportions,
- the zone isn’t an Empty zone with no visible style.
23.3. A zone vanished from my image
A nested-workspace zone stops being rendered for visitors when the workspace it points at is in the trash — the plugin hides it rather than sending people to a dead end. The zone itself is not lost: open the workspace in the editor and it is still there, exactly where you drew it.
Two ways out: restore the target workspace from WP InSpot → Workspaces → Trash, or open the zone and point it at another workspace (or delete it, if it is no longer needed).
23.4. An entity zone shows no data
Check that:
- the linked post or page is published,
- the zone points to an existing post,
- the template doesn’t consist only of fields the post has no values for.
23.5. A link does not work
Check that:
- the URL is complete (external links need
https://…), - an internal path starts with
/, - the new tab option is set as intended.
23.6. Import skips zones
The importer skips zones whose image, post, template or child workspace does not exist on the target site. Add the missing media or content and run the import again.
23.7. Cannot create another workspace
The Free version allows 3 workspaces (published plus drafts). Trash unneeded ones, or upgrade to Pro for unlimited workspaces. Note that trashed workspaces no longer count toward the limit, and you can restore them later from the Trash tab.
23.8. A zone effect is not animating
Your plan is not the reason: zone effects work on every plan, Free included. They pause by design while the zone is hovered or keyboard-focused, and they are disabled entirely for visitors whose system has the “reduce motion” preference turned on — check that preference on the device you are testing with. Also note that text label zones do not support effects.
23.9. Content opens as a sheet instead of a popup
That is the small-screen behavior: below 576 px, zone content deliberately opens in the bottom sheet. Turn off Open content in the bottom sheet on small screens under Settings → Zones → Content display if you want popups at every width. This threshold is separate from the mobile breakpoint, so a narrow browser window can trigger it while the image is still in its desktop layout.
23.10. A workspace disappeared from the list
Check the Trash tab — it may have been trashed rather than deleted, and Restore brings it back as a draft. If it was a nested workspace whose parent is trashed, look at the top level of the list: children of a trashed parent are promoted to root so they stay reachable.
23.11. Zone content still shows a brief “Loading…”
Content is normally warmed in the background, so this should be rare. It is expected in these cases:
- the visitor opened a zone within the first moment of the page loading, before the warm-up finished,
- the image has more than 20 entity zones — the batch covers the first 20; the rest load on demand,
- the visitor’s browser has data saver enabled, which disables all prefetching by design,
- you are looking at the editor preview, which deliberately never prefetches so it always shows current, unsaved data.
If it happens consistently outside those cases, the usual cause is a slow server response to admin-ajax.php — check with a plugin-conflict test or your host’s PHP performance, since the plugin’s own work in that request is only a small part of it.
23.12. Analytics events do not show up in GA4
Check the basics in order: (1) is gtag or dataLayer actually present on the page with the image (view the page source)? (2) does the image itself work? (3) open DebugView and interact with the image — standard GA4 reports lag by 24–48 h, DebugView is live. If the site loads GA through a consent manager, accept consent first. See the Analytics section for the full event reference.
23.13. An action button does not appear
A block with no slug is rejected on the server, on purpose: a button firing an event nobody can listen for would be worse than no button at all. Open the template and check that the block has a slug.
The slug is also sanitized down to the characters a–z 0–9 _ -, so “Contact Form” is stored as contact-form. Copy the slug from the field in the builder rather than from memory — that mismatch is the usual reason a handler never runs.
On a Free plan you cannot add new action buttons; buttons already saved in the template keep rendering and keep firing their event.
23.14. A download button does not appear
The most likely reason is that the field is empty for this particular entry — an entry whose file field holds nothing simply does not get a button, instead of getting a dead link. Open another entry that does have a file to confirm.
If no entry renders the button, check the field you picked in the template: the picker’s second group is labelled “may not contain a file” precisely because those fields are not known to hold one. Also check the value itself — only http/https addresses and paths starting with / are accepted.
23.15. The table does not appear on the page
A table that has nothing to show renders nothing rather than an empty frame, and there are four reasons for it — check them in this order:
- the workspace has no table template assigned and no ancestor names one (the workspace’s settings panel says so explicitly),
- the assigned template has no columns yet,
- no zone qualifies as a row — decorative zones, and link zones without an address, never become rows,
- the workspace is not published, and you are viewing the page as someone who may not edit it.
Also check the ID in the block or shortcode, and refresh the page cache. In the block editor, a workspace with no table shows a plain note instead of a preview, which is the quickest way to tell this apart from a broken ID.
23.16. Table rows are not clickable
Rows drive the interactive image, so they are only clickable while there is an image on the page for them to drive:
- there is no image of that workspace on the page — a table on its own is deliberately plain content,
- the image has not started up yet: it initializes just before it scrolls into view,
- the visitor is below the mobile breakpoint, where the image becomes the list view and the table goes back to being a plain table,
- the image block points at a different workspace than the table.
23.17. A column is empty in every row
Take it key by key:
- the field key is misspelled, or belongs to a plugin that is not active — a key that resolves to nothing is never reported as an error, by design,
- the entries attached to those zones are drafts: unpublished content never contributes a cell value,
- the rows have no entry at all (text zones, nested workspaces, links) — only the
zone:keys say anything for those, - the field holds an image, a gallery or another structured value, which a table cell cannot print.
The “Has a value in:” hint in the column builder is the fastest way to check a key against your own content — bearing in mind it only samples the 10 most recent published entries of each previewed type.
23.18. Visitors still see the old styling after a licence change
Buying, renewing, switching plans or letting a licence lapse changes what the page carries, because the workspace payload is written into the page HTML — and a cached copy of that page keeps the state it was built with. That is why you can see the new zone colours while logged in and visitors do not.
Since 1.5.4 WP InSpot clears this up for you as far as it can reach: on a licence change it purges the caches of WP Rocket, W3 Total Cache, WP Super Cache, LiteSpeed Cache, WP Fastest Cache, Cache Enabler, SiteGround Optimizer, Breeze, Hummingbird and Nginx Helper, and leaves a one-time reminder in the dashboard. Anything above WordPress is still yours to clear: a CDN, a host-level cache, or a caching plugin outside that list.
24. Editorial best practices
24.1. Naming workspaces
Name workspaces so they are easy to find in pickers and breadcrumbs, e.g. “Building A — floor 2” rather than “plan2”. On multilingual sites, include the context that distinguishes translations.
24.2. Naming zones
Zone labels are visitor-facing: they appear in tooltips, in the mobile list and in screen reader announcements. “Kitchen — 12.5 m²” tells a visitor far more than “zone 7”.
24.3. Choosing zone types
- Short caption → Text zone with a popup.
- Longer description → Text zone with a drawer or modal.
- Content that already exists as a post/page/product → Entity zone.
- “Go deeper” navigation → Nested Workspace.
- Anything living on another page → Link.
24.4. Working with images
- Use images sized for the web; very large files slow down mobile visitors.
- Keep proportions when replacing an image — zones keep their coordinates, so a very different crop shifts them visually.
- For panoramas, prefer wide, evenly lit images.
25. Pre-launch checklist
Before publishing a page with a workspace, run through:
- The workspace is published and has an image.
- All active zones have readable labels and the intended type.
- Entity zones point to published content; templates show the fields you expect.
- Zone colors are visible against the image.
- The interactive image works on desktop and mobile, including keyboard navigation.
- Nested workspaces allow going back; links open the right targets.
- Fullscreen works, if enabled.
- If the page carries a table view: every column has the header you want, the empty cell reads the way you want it to, and rows and zones highlight each other.
- The page cache was refreshed after the changes — and after any licence change, your CDN too.
- If the site runs GA4 or Google Tag Manager, interact with the image and confirm the
inspot_*events arrive (GA4 DebugView shows them live; standard reports lag by a day or two).
26. Technical reference
Information for administrators and developers. Regular users can safely skip this section.
26.1. Requirements and libraries
WordPress 5.9+, PHP 8.0+. The frontend viewer is built on Leaflet, zone drawing in the admin uses Leaflet-Geoman, built-in marker icons come from Material Symbols, and licensing runs on the Freemius SDK (2.13.4). All assets are served locally from the plugin — no CDN calls.
26.2. Data storage
Workspaces are a custom post type:
inspot_workspace(not publicly queryable, no archive or rewrite, hierarchical, REST-enabled, visible in the admin UI). Zone and template data lives in dedicated tables with your WordPress prefix:
| Table | Purpose |
|---|---|
{prefix}inspot_images | Images assigned to workspaces. |
{prefix}inspot_polygons | Zones drawn on the images. |
{prefix}inspot_templates | Entity presentation templates. |
{prefix}inspot_table_templates | Column sets for the table view. |
{prefix}inspot_icon_library | Custom SVG icons. |
Settings are stored in the wp_inspot_settings option; the schema version in wp_inspot_schema_version. Tables are created on activation and migrated automatically on updates.
The current schema version is 1.17.0, which added inspot_table_templates. The upgrade creates that one table, empty; nothing existing is read, rewritten or removed, and a workspace with no table template assigned behaves exactly as it did before the update. A workspace’s assignment itself is post meta (_inspot_table_template_id), where an absent value means “inherit from the nearest ancestor”, not “no table”.
26.3. Embedding surface
The shortcode is [wp_inspot id="123"] (optional class attribute); the Gutenberg block is wp-inspot/map (server-rendered). The Elementor widget registers only when the Pro license allows it.
The table view has its own pair: the shortcode [wp_inspot_table id="123"] and the block wp-inspot/table, both rendered on the server by the same code — the block’s editor preview asks WordPress’s own block-renderer route for exactly the markup the front end prints, so there is no second implementation to drift. Both emit an HTML comment rather than visible markup when there is nothing to show, and neither enqueues the viewer bundle or Leaflet: a page carrying only a table loads a small stylesheet and a small script and nothing else.
Levels are fetched by a public read endpoint, inspot_get_table, which returns the rendered table for one workspace. It applies the same visibility rule as the zone-data endpoint — published workspaces to anyone, unpublished only to users who may edit them — and that rule is applied inside the renderer itself, so the shortcode, the block and the endpoint cannot disagree about it.
The zone-data endpoint (inspot_get_workspace_data) accepts an optional context parameter. With context=editor it returns the editor’s view of a workspace, which keeps nested-workspace zones whose target is trashed or missing so the editor can repair them; any other value, including none, returns the visitor’s view, where those zones are dropped. The parameter states intent only — it is combined with the edit capability, so requesting the editor view without that capability silently yields the visitor view. It can only ever narrow what a caller sees, never widen it.
Internal identifiers such as the block name wp-inspot/map, the CSS class prefix wp-inspot-map* and the inspot_map_* analytics events keep the plugin’s original “map” vocabulary on purpose. Renaming them would break custom CSS, saved blocks and existing analytics reports; only the human-facing interface language changed in 1.2.7.
26.4. Security model
- Every admin operation requires a WordPress nonce and the matching capability — editing zones requires permission to edit that workspace, settings require administrator rights.
- Frontend data endpoints serve only published workspaces publicly; drafts are visible only to users who can edit them (this powers the editor preview). The table view applies the same rule twice over: an unpublished workspace renders no table for a visitor, and inside a published one, cells coming from an unpublished entry stay empty.
- All zone input is validated server-side (IDs, shape and zone types, coordinates, colors, opacities, URLs); text content passes through
wp_kses_post, URLs throughesc_url_raw. - Uploaded SVG icons are sanitized: scripts, event handlers, style/foreignObject elements and external references are removed, and the icons directory blocks PHP execution.
- A download button’s address is restricted to
http,httpsand root-relative paths before it reaches anhref— where, unlike an imagesrc, ajavascript:address would be executable. An action button with no slug is rejected on save.
26.5. Performance notes
Frontend assets are enqueued only on pages containing a workspace, and interactive images initialize via IntersectionObserver (with a fallback) so below-the-fold ones cost nothing up front.
Beyond that, several layers work to make the viewer feel immediate:
- Inlined first payload. For anonymous visitors on a published workspace, the workspace data is embedded directly in the page HTML, so the first render needs no AJAX round-trip at all. Logged-in users who can edit the workspace still fetch it normally, so drafts and unsaved changes are never served from a cached page.
- Batched entity prefetching. Shortly after a view builds, the plugin warms the content behind its entity zones in a single request covering up to 20 zones, rather than one request per zone. This matters more than it sounds: most of the cost of a WordPress AJAX call is the framework booting, not the query, so collapsing twenty boots into one is the difference between a multi-second warm-up and a fraction of a second on typical shared hosting.
- Idle prefetching for nested workspaces. Data for nested workspaces and their first images is warmed during browser idle time, a few requests at a time so a hub with dozens of child zones cannot flood the server. Entity batching and nested-workspace warming run concurrently, so neither waits on the other.
- Intent prefetching. Hovering or touching a zone warms exactly that zone’s payload ahead of the click.
- No loading flash. When a zone’s content is already in the cache, it renders in the same frame the zone opens — the popup, drawer or mobile sheet never shows a loading state for content it already has.
- Session cache and request de-duplication. Revisited views are served from memory, and a prefetch racing a click share one request rather than firing two.
- Batched lookups. Posts referenced by entity zones are primed in one query batch, avoiding N+1 lookups on zone-heavy images.
- Media hygiene. Video and audio inside zone content are not re-downloaded each time a zone is hovered.
All of the prefetching above is skipped entirely under the browser’s data-saver setting, and image warm-up is additionally skipped on 2G-class connections.
The table view is deliberately outside all of this. It is rendered on the server and needs no data round-trip to be complete, its assets load only when a table is actually printed on the page, and a page carrying only a table loads no viewer code at all. When a visitor drills through levels, each level’s table is fetched once and kept for the rest of the page’s life, so walking back and forth through a branch costs one request per level rather than one per visit.
26.6. WP InEstate hooks
The integration is filter-based and safe without WP InEstate present:
| Filter | Role |
|---|---|
inestate_export_inspot_workspaces | Exports selected workspaces into WP InEstate’s export format. |
inestate_import_inspot_workspaces | Imports workspaces from WP InEstate import data. |
inestate_get_inspot_workspace_tree | Supplies the workspace tree to the export UI. |
26.7. Developer filters
| Filter | Role |
|---|---|
wp_inspot_analytics | Return false to disable GA4/GTM forwarding; the inspot:* DOM events keep firing. |
wp_inspot_picker_palette | Customizes the theme color swatches offered in the zone color pickers. |
wp_inspot_post_type_meta_fields | Lets the plugin that owns a post type declare its meta fields to the pickers, protected underscore-prefixed keys included. |
wp_inspot_post_type_virtual_fields | Offers a computed key in the same pickers — a value that is not stored the way it is shown. |
wp_inspot_resolve_field | Answers a computed key with its value, formatted by the plugin that owns it. |
Declaring stored fields. Keyed by the raw meta key; WP InSpot adds the meta: prefix itself. Every entry key but the label is optional, and an unknown type falls back to text:
add_filter('wp_inspot_post_type_meta_fields', function (array $fields, string $post_type): array {
    if ($post_type !== 'inestate_unit') {
        return $fields;
    }

    $fields['_inestate_price'] = ['label' => __('Price', 'wp-inestate'), 'type' => 'text', 'group' => 'WP InEstate'];
    $fields['_inestate_area']  = ['label' => __('Area', 'wp-inestate'),  'type' => 'text', 'group' => 'WP InEstate'];

    return $fields;
}, 10, 2);
A declaration replaces the built-in list for that post type, so declare every field you want offered, including ones WP InSpot already found by itself.
Computed fields work in two halves: wp_inspot_post_type_virtual_fields offers the key, wp_inspot_resolve_field returns its value — a price with its currency, a status with its label, a figure stored nowhere at all. A contributed key must carry its own prefix; meta, acf and wc are refused, as is any bare core field name. The resolve filter runs last, so a plugin can add to the vocabulary and can never change what post_title, an ACF field or a meta key mean.
Where the trust ends: a declared field is offered in the picker, which is the point — the plugin that owns the data decides what is publishable and the template author decides what to show. Everything else holds. Values still come only from published entries, output is still escaped, and HTML returned for a rich text field is sanitised rather than trusted.
26.8. Table view markup
The table is plain HTML with stable hooks for CSS. Nothing here is generated by JavaScript, so it is all present in the page source:
| Hook | Where and what it is |
|---|---|
.wp-inspot-table-wrap | The scroll container. Carries role="region", tabindex="0" and an accessible name taken from the workspace title. |
.wp-inspot-table | The table itself. Carries data-workspace-id — the level currently shown, which changes as the visitor drills down. |
.wp-inspot-table__row | Every row, header row included (which adds --head). Body rows carry data-polygon-id, the zone’s ID. |
.wp-inspot-table__cell | Every cell, header cells included (which add --head). |
.wp-inspot-table__cell--empty | A cell filled with the template’s empty placeholder. The only reliable way to tell one from a cell whose value happens to be a dash. |
data-column-id | On every header and cell — c1, c2, … — the way to style exactly one column. |
data-value | On non-empty cells: the stored value as space-separated tokens, for [data-value~="…"] rules. Absent on empty cells, on the permalink column and on values over 32 characters. |
.wp-inspot-table-wrap--linked | Added to the container while rows are actually driving an image, so “clickable” styling only appears when rows are clickable. |
.wp-inspot-table__row--active | The row highlighted right now, from either side of the pairing. |
.wp-inspot-table__activate | The button the script wraps the first cell’s content in for keyboard access. Absent until rows become interactive. |
The channel between a table and its image is a set of private DOM events dispatched on the image’s own wrapper element. It is deliberately separate from the public inspot:* events — those are notifications for analytics and site code, these are commands — and it is not part of the documented API.